
Figma is becoming a great tool for UX designers to quickly design, build prototypes and provide designer to developer hand-off. The greatest advantage of Figma is, It is web-based and platform-independent. Provides tools to create slick animations/transitions without having to download third-party app plugins.
In this article we are focussing on real world challenges we faced during the project and tips and tricks to improve overall productivity, most importantly how to optimise the prototypes for low-end devices.
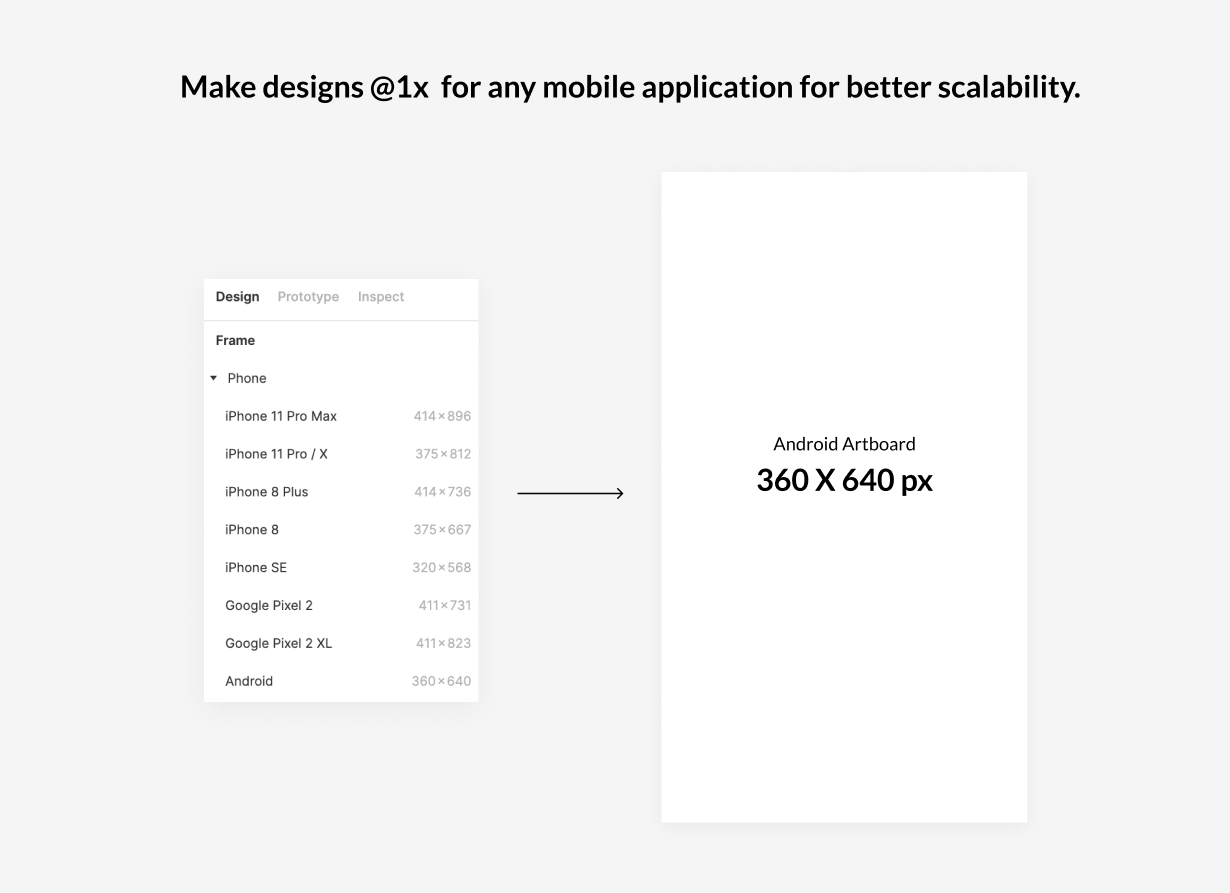
Always design for Minimum Common Denominator
When the experience needs to work for a range of devices ( especially in a country like India ), it’s important to design for the minimum form factor that needs to be supported and ensure the design scales well across all resolutions. Classic mistake designers do is realising this late in the project.
Few things to keep in mind
- If you need to support android and ios you can use the artboard size to (360 X 640)px this will ensure the design will scale well when using long scroll design, however, in fixed-size layouts you will notice a black bar at the top and bottom of the prototype on large form factors which is still ok for prototype testing.
- Set the export resolution @1x to ensure optimised file size for faster loading for low-end devices.
Use Master Components
The biggest productivity killer is having to link prototypes across frames and art-boards, this can be repetitive, boring and time-consuming. Figma has a solution for this in terms of master components.
For example, You’re designing a navigation bar for the app, early in your process converting your navigation menu into a master component. Once you’ve done that, link each menu item of that master component to the appropriate frame. Moving forward, any time you create an instance of the master component, all the connections will automatically connect.
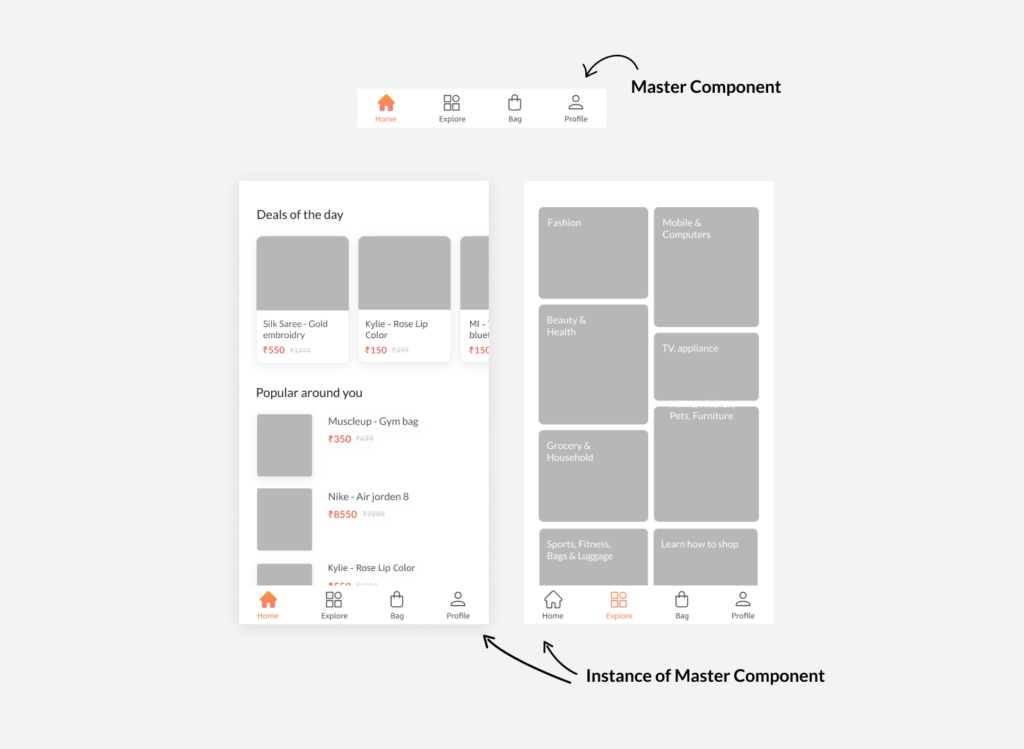
Linking the prototype becomes super easy, you just have to link each menu item of that master component to the appropriate target and the tedious work of connecting each item with the frame multiple times is done for you magically.
An additional advantage being, It will reuse the same assets which helps in performance optimisation of the prototype.
Note: Make sure the Master component in the same file, This does not work if you’re dragging an instance of a component from a team library.
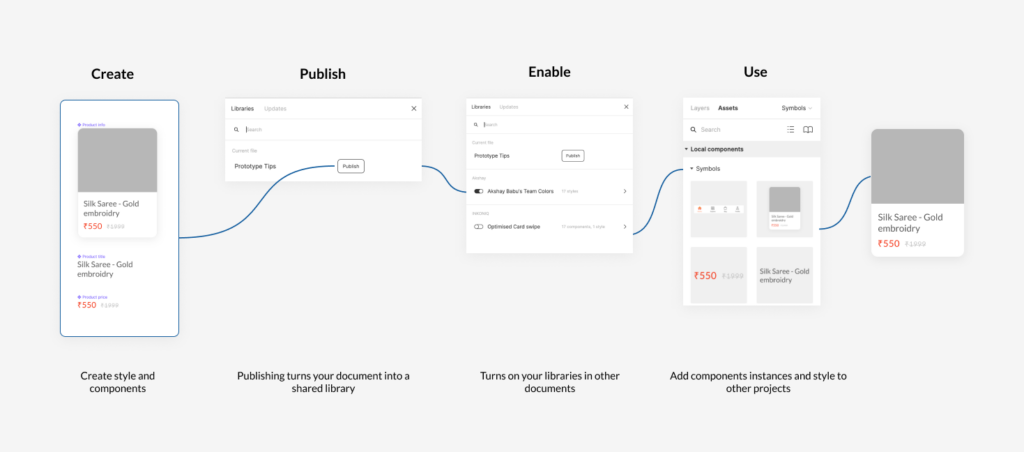
Use of a shared external library
Once you make something a component, you can create an instance of it, which are essentially connected copies of that component—so if you update the design of the original component, the instances will reflect that change. For example, if you change the color of a button component to red, and then publish those changes, any file that used instances of that button will get a notification. They can then choose whether to update their instances to red.
When you need multiple variations of the prototype and reuse components across files you can maintain shared components and styles by publishing them. This creates a shared library, that can be used across variations of the design/prototype. Updates to the design of your components can be published and pushed out to other documents where instances of your components live.
Note: Huge component libraries can make your prototypes slow especially on low-end devices, component sets with thousands of variants in them will contribute to significant memory usage. You will have to pay a lot of attention to this one.
Optimise your prototype for better performance
We learnt this the hard way. Our prototype had 80+ frames, believed that we had created a reasonably optimised prototype … But, during pilot usability tests on devices with low ram < 4GB, we found it very laggy, the scroll was choppy and the prototype started to crash.
It’s very important that your prototype is super optimised especially for low-end devices.
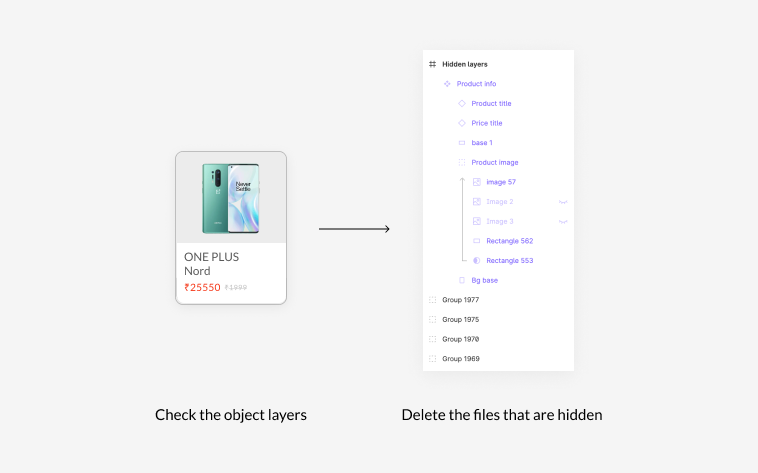
Reduce the file size
Make a copy of the design file before creating the prototype, optimise the file by removing and cleaning up unused layers, components… If you’re using hidden layers as different states of the component try creating variants instead.
You’ll also have to take into consideration the dimensions of your component sets. Few component sets with thousands of variants will add up to file size. Use the external library here.
Compression! Compression! And Compression!
Compress images as much as you can. This step is most important as it significantly improves the speed of your prototype and reduce crashes. Figma has few plugins to achieve the same
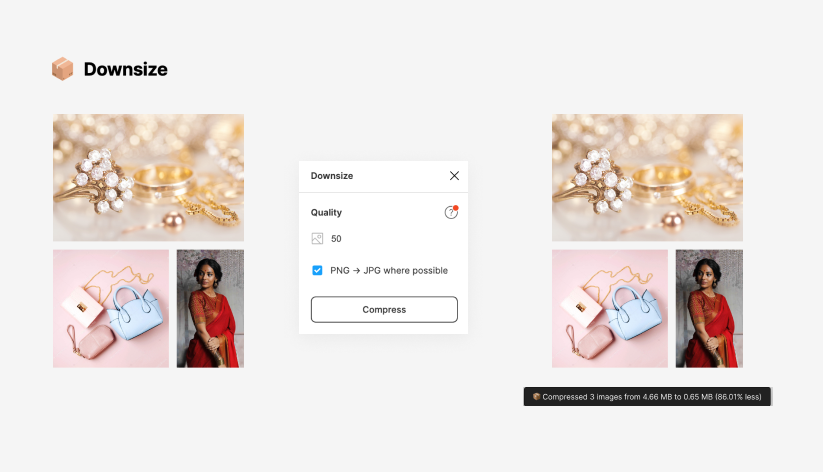
Downsize Plugin: Use this plugin to compress your PNGs and convert them to JPG wherever possible. The advantage of this plugin is that it will compress your images within the artboard itself.
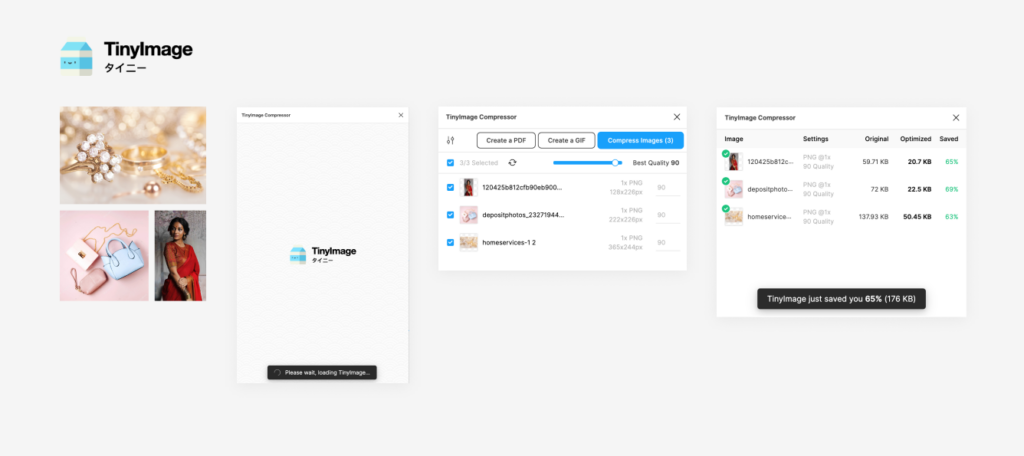
Tiny Image Plugin: You control the exact level of compression even without using aggressive compression levels, TinyImage will drastically compress your image exports from Figma. You can apply a default level for all your image compressions, then optionally add specific compression overrides per image for even more control you make the prototype load faster by reducing all your image sizes by up to 95%
Note: There’s no going back once you’ve got downsized all the pictures hence, it’s better to have a backup
Use Smart animate Judiciously
While smart animate quickens animation, if the files aren’t optimised, they can cause CPU and memory bottlenecks, resulting in crashes. When it comes to figuring out how to animate transitions, Smart Animate is concerned with a few things.
- Layer name
- Layer hierarchy
- Layer opacity
One quick way to create frames for Smart Animate is to duplicate them. This keeps the naming consistent between each frame. You can then add and remove layers to each frame, as needed. Layer names play an important role in smart animate to determine which layers change and how they change. Make sure the layers in both compositions match exactly so Figma can keep track of them correctly.
Few Tips:
Reduce the use of smart animate wherever possible and replace smart animate to instant will consume less RAM.
I hope you are able to get more juice out of Figma with these tips and tricks. Please share your suggestions or feedback to [email protected]